 Download
Download
Download
To hide a face, you cover it with a blur, a pixelation, a solid shape, or a bar across the eyes, and then bake that cover into the exported pixels. The practical way to do it is to let software find faces automatically and cover them at once, then export a new flattened file where the cover is part of the image itself rather than a layer sitting on top. HideFace does that on your own computer, so the photo or video you import never gets uploaded anywhere.
The rest of this guide covers which cover style to pick, why video is harder than a photo, what a covered face still gives away, and how the common approaches compare. If you already know what you need, the specific guides at the bottom go deeper.
Download HideFace for Windows
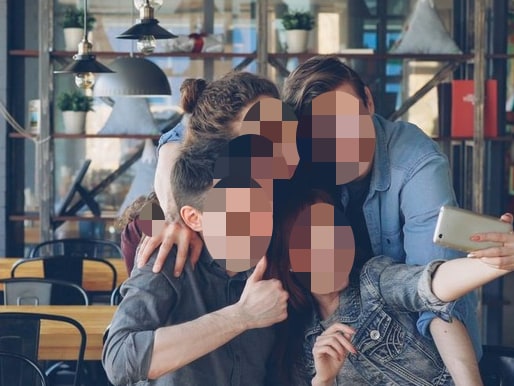
Faces found and covered at once, in this case with pixelation
They are not interchangeable. The right one depends on whether you want the photo to still look natural or want no doubt at all that the person is unidentifiable.
If the stakes are high, pick solid, mosaic, or a heavy pixelation. If you just do not want strangers in your holiday photo to be identifiable, blur or emoji is fine.
In a photo the face stays put, so one cover does the job. In video the face moves every frame, so the cover has to move with it. Tools that blur each frame independently tend to lag behind or lose the face when someone turns, and a single clean frame is all it takes for someone to pause the video and identify the person.
If you are working with video, the thing to check is whether the tool tracks faces across frames, and then scrub the whole timeline yourself before publishing. Also check the thumbnail: platforms often pick a cover frame automatically, and it can come from an uncovered moment.
This is the part most guides skip. Covering the face is the biggest step, but people are identifiable in other ways, and if anonymity actually matters you should check for:
HideFace covers faces. It does not read tattoos, strip location data, or change audio, so handle those separately. Cropping the shot and re-saving it deals with most of them.
There are three normal ways people do this, and they suit different situations.
If you have one photo and already own Photoshop, use Photoshop. If you have a folder of photos, a video, or anything you would not want sitting on a stranger’s server, a local tool is the better answer.
A cover is only real if it is part of the file you share. Save a flattened copy such as a JPG, PNG, or MP4 rather than sharing a layered project file, and share that copy rather than the original. HideFace always exports a new flattened file and leaves your original untouched, so the cover is baked into the exported pixels and there is no removable layer to peel back.
For a face that must not be recognizable, pick solid coverage, a strong mosaic, or heavy pixelation instead of a light blur.
Cover it with a strong blur, pixelation, or a solid shape, then export a new flattened file. Avoid sharing a layered project where the cover sits on a separate removable layer.
A very light blur can sometimes be partially reversed, which is why a strong blur, mosaic, pixelation, or solid cover is safer. Once exported and flattened, the cover is baked into the pixels of that file and there is no removable original layer underneath.
Use a tool that tracks each face across frames rather than covering one frame at a time, then watch the whole clip back before publishing and check the thumbnail too.
Yes. HideFace is free for unlimited photos and for short video exports, and GIMP is free if you prefer to mask faces manually.
No. Detection, covering, and export all happen on your own computer, so the photos you import are never uploaded.
Not on its own. Reflections, tattoos, background text, vehicle plates, file metadata, and audio can still identify a person, so check those too.